adb の screencap コマンドを使ってスクリーンショットを取得して WPF に表示します。
処理
BitmapImage を返す関数 を作成
adb の screencap コマンド で取得できた Byteデータを、BitmapImage に変換して返す関数を作成します。
1
2
3
4
5
6
7
8
9
10
11
12
13
14
15
16
17
18
19
20
21
22
23
24
25
26
27
28
29
| private BitmapImage getScreenshot()
{
using (var process = new Process()) {
process.StartInfo = new ProcessStartInfo()
{
UseShellExecute = false,
RedirectStandardOutput = true,
CreateNoWindow = true,
FileName = @"C:\Program Files\Nox\bin\nox_adb.exe",
Arguments = "exec-out screencap -p"
};
process.Start();
using (var memoryStraam = new MemoryStream())
{
process.StandardOutput.BaseStream.CopyTo(memoryStraam);
if (memoryStraam.Length == 0) return null;
using (var memoryStream = new MemoryStream(memoryStraam.ToArray()))
{
var bitmapImage = new BitmapImage();
bitmapImage.BeginInit();
bitmapImage.CacheOption = BitmapCacheOption.OnLoad;
bitmapImage.StreamSource = memoryStream;
bitmapImage.EndInit();
bitmapImage.Freeze();
return bitmapImage;
}
}
}
}
|
ボタンを押した時に呼び出す
1
| image.Source = getScreenshot();
|
Image コントロールの Source に BitmapImage を設定して画面に表示します。
躓いた点
スクリーンショットを取得するコマンドで「shell screencap」を使うと上手く取得出来なかったです。代わりに「exec-out screencap」を使ったら取得できるようになりました。
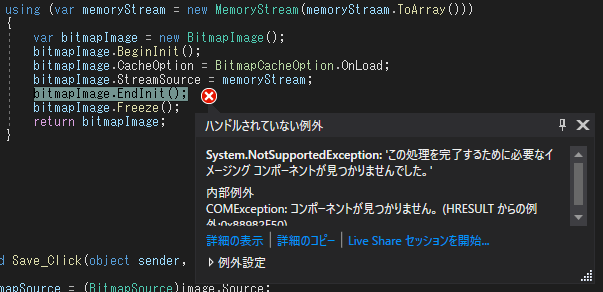
System.NotSupportedException
この処理を完了するために必要なイメージング コンポーネントが見つかりませんでした。
COMException: コンポーネントが見つかりません。 (HRESULT からの例外:0x88982F50)