Selenium を使って指定範囲のスクリーンショットを保存する方法です。備忘録になります。
はじめに
Windows 10 Home 21H1
Python 3.8.10
既に Selenium でスクレイピングが出来ること
コード 1 2 3 4 5 6 7 8 9 10 11 12 13 14 15 16 17 18 19 20 21 22 23 24 25 26 27 28 29 from selenium import webdriver from selenium.webdriver.chrome.options import Options from selenium.webdriver.common.by import By from time import sleep options = Options() # ヘッドレスモード(画面を出してスクリーンショットすると、全体が撮れないため) options.add_argument("--headless") driver = webdriver.Chrome(executable_path="C:\chromedriver_win32\chromedriver.exe", options=options) driver.get("https://www.yahoo.co.jp/") # 読み込み待ち sleep(3) # ページのサイズを取得してドライバーに設定 w = driver.execute_script('return document.body.scrollWidth') h = driver.execute_script('return document.body.scrollHeight') driver.set_window_size(w, h) # 範囲を指定してスクリーンショットを撮る png = driver.find_element(By.ID, 'Service').screenshot_as_png # ファイルに保存 with open('./screenshot.png', 'wb') as f: f.write(png) driver.close() driver.quit()
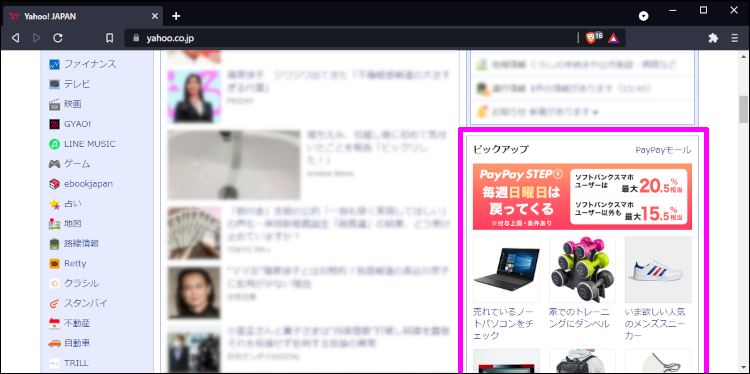
これを実行すると Yahooページのピックアップ欄がスクリーンショットされます。
注意事項 ヘッドレスモードやページサイズを指定しているのは、指定範囲が見切れていたときに正常にスクリーンショットできなかったためです。
今回の方法を使えば、こういう風に指定範囲が見切れていても正常にスクリーンショットすることができます。
指定範囲に XPath を設定 Yahooページのピックアップ欄に ID属性 が設定されていたので簡単にできましたが、ID属性が指定されていなかったり構造が複雑だった場合は XPath を設定すると簡単にスクリーンショットできます。
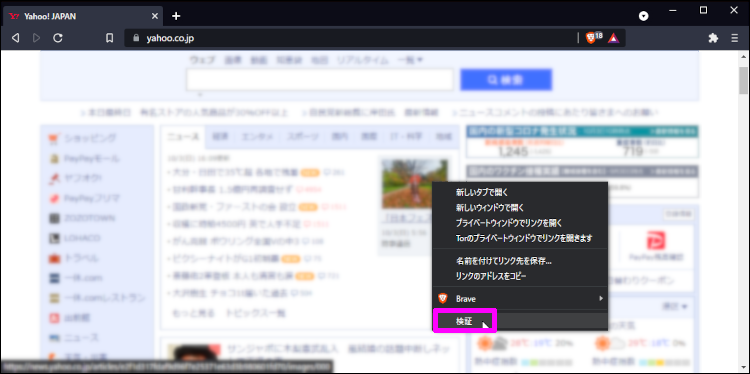
XPath の調べ方 まず、スクリーンショットしたい箇所で右クリックをして「検証」を選択します。
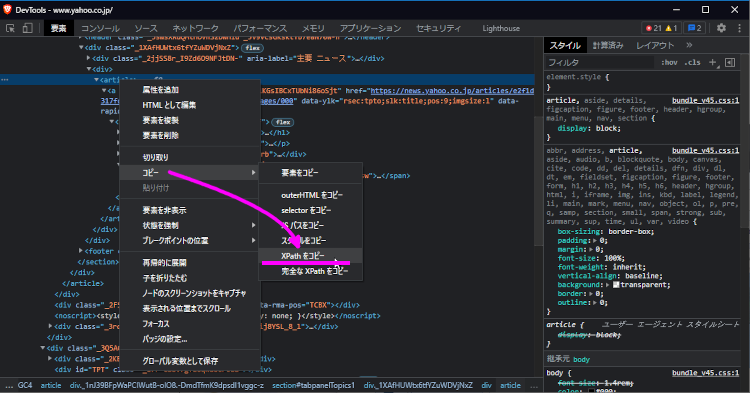
スクリーンショットしたいHTMLタグを選んでから右クリックで「コピー」の XPathをコピー を選択すると、簡単に XPath が分かります。
あとは find_element_by_xpath に貼り付ければ完了です。
1
2
# 範囲を指定してスクリーンショットを撮る png = driver.find_element(By.XPATH, '//*[@id="tabpanelTopics1"]/div/div[2]/article').screenshot_as_png
実行すると指定範囲がスクリーンショットされます。